How Do I Join a Study, Register as a Site Administrator, and Submit
a SQF for ERT Portal?
To join a study:
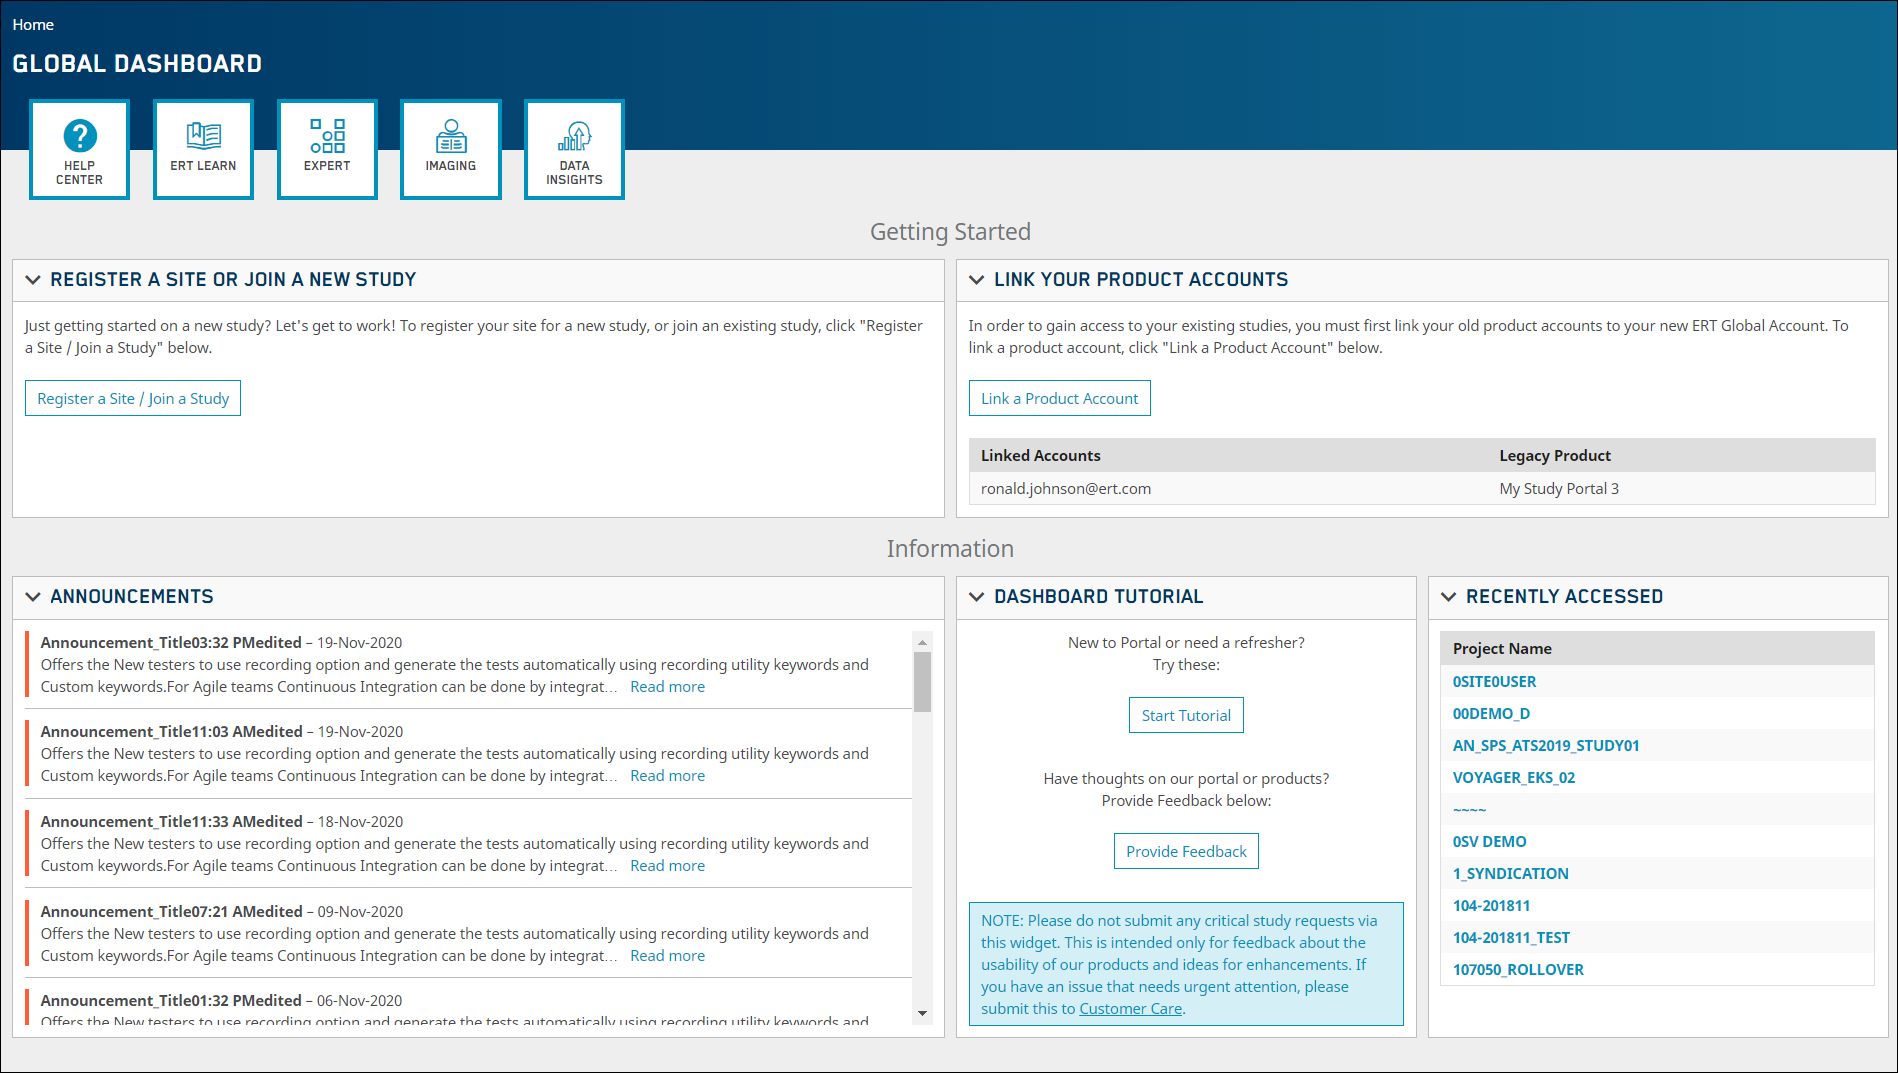
Log in to the Global Dashboard
and click the Register
a Site/Join a Study button.
(If
you do not already have an ERT Global Account, please refer to the
topic, How Do I Create an
ERT Global Account?, which
can be found in the ERT Global Account online help.)
button.
(If
you do not already have an ERT Global Account, please refer to the
topic, How Do I Create an
ERT Global Account?, which
can be found in the ERT Global Account online help.)
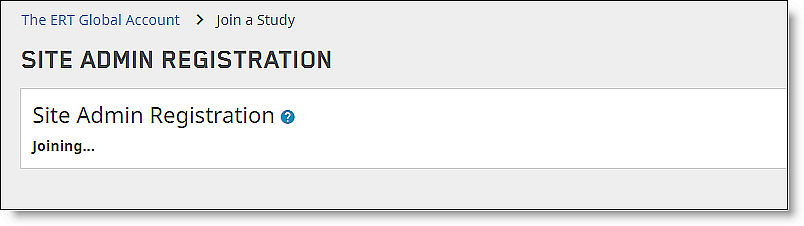
The
Join a Study window opens. Mandatory
fields that must be selected are indicated with a red asterisk (*).

In the Join a
Study window, enter
the Site Qualification PIN and click Next.

A message displays to confirm
you are joining the proper study. Click Okay.


|
If you do not have an ERT Portal account
linked with your ERT Global Account, the Have an Account window displays. If you currently have an account,
click Yes
, then click Next,
and follow the on-screen instructions. If you do not currently
have a portal account, click No and
follow the on-screen instructions. |
After you complete the previous
step, a message specifying the study is being joined displays. No action
is required on this window as it is automated.
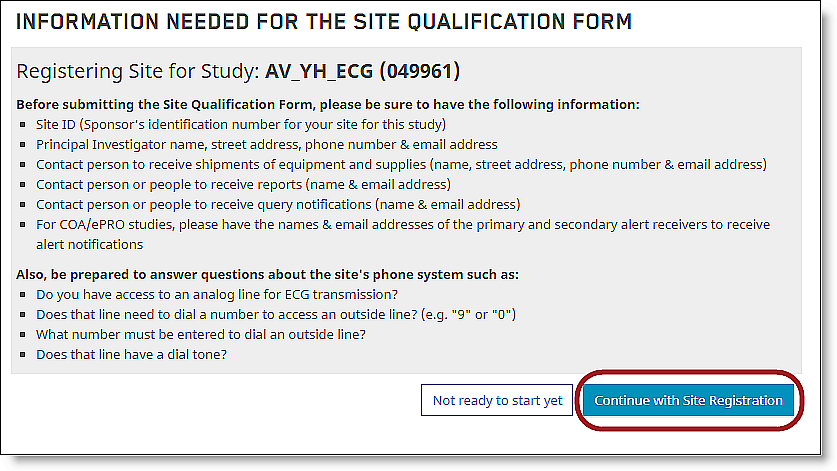
To submit a SQF:
After you complete the Join
A Study process and/or log in and select the New
SQF button, a window displays that shows the necessary prerequisites
for submitting a SQF. Please read the entire page before proceeding.
After reading the prerequisites,
you can either click Continue
with Site Registration, if you have all items you need, or click
Not ready to start yet,
if you need additional information.
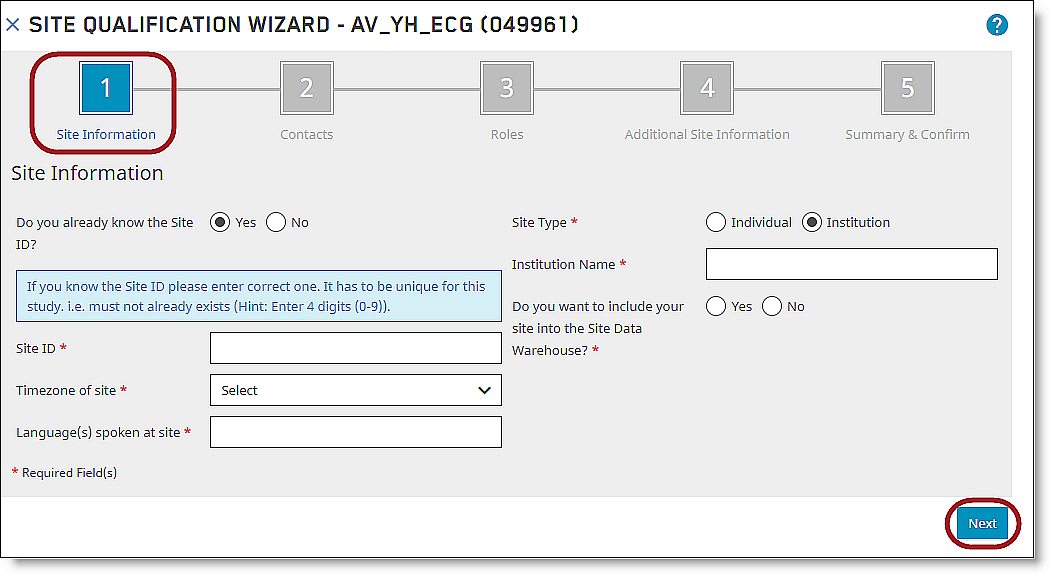
5a.
If you continue, follow Steps 1 through 5 in the Site
Qualification Wizard.
For Step 1 of the SQF wizard,
fill in the requested site information and click Next
when finished.
|
By
agreeing to be included in ERT's Site Data Warehouse, you will
participate in sharing your profile information with clinical
trial sponsors seeking
investigators to support clinical trials. Further information
will be emailed to the Principal Investigator’s email provided
on the Site Qualification Form. (Optional). |
5b.
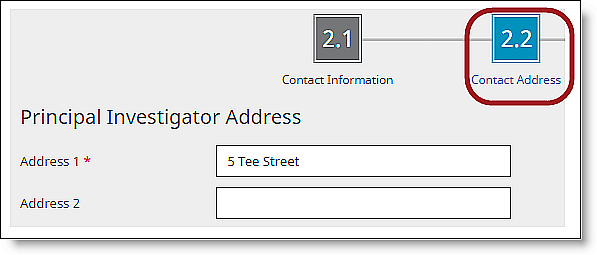
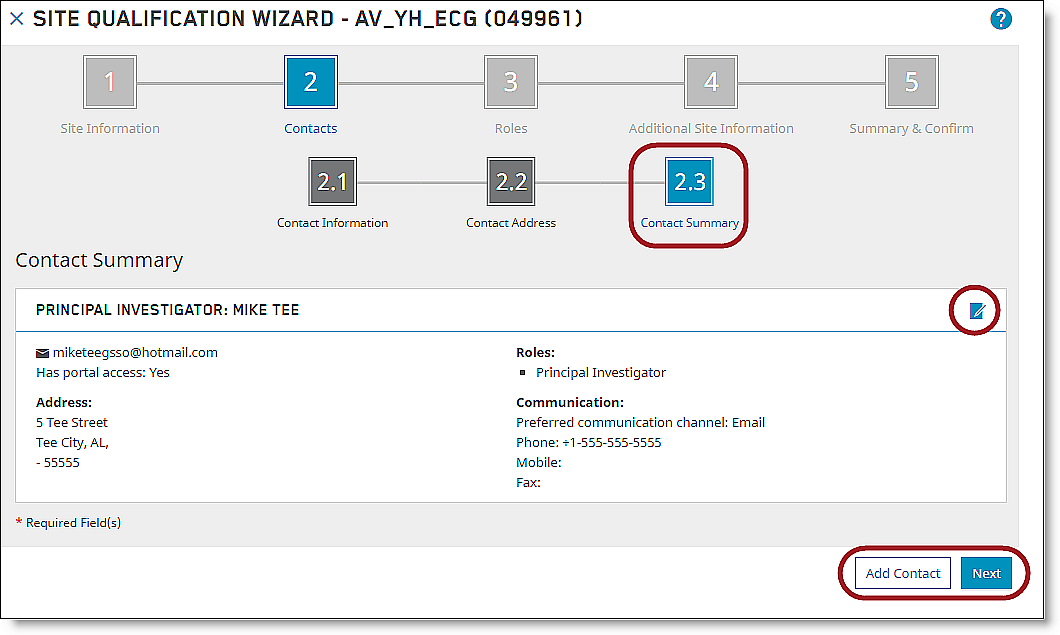
For Step 2, Contacts,
you will fill out sub-steps: 2.1 Contact Information, 2.2 Contact Address,
and 2.3 Contact Summary.
|
Mandatory
fields that must be selected are indicated with a red asterisk
(*). |
Enter the requested Contact Information for the Principal Investigator
(PI) and click Next to continue.
Proceed through all 3 sub-steps to specify the PI contact information.
A different reporting email
address from your portal login address can
be specified if alerts and reports should be sent to another address.

5c. After you complete Step
2.2 of the SQF, you will see 2.3 Contact Summary.
Review before proceeding. If there is incorrect information, click the
Edit icon to edit the information.
5d. Continue adding study site
users and their contact information by clicking Add
Contact.
5e. Click Next
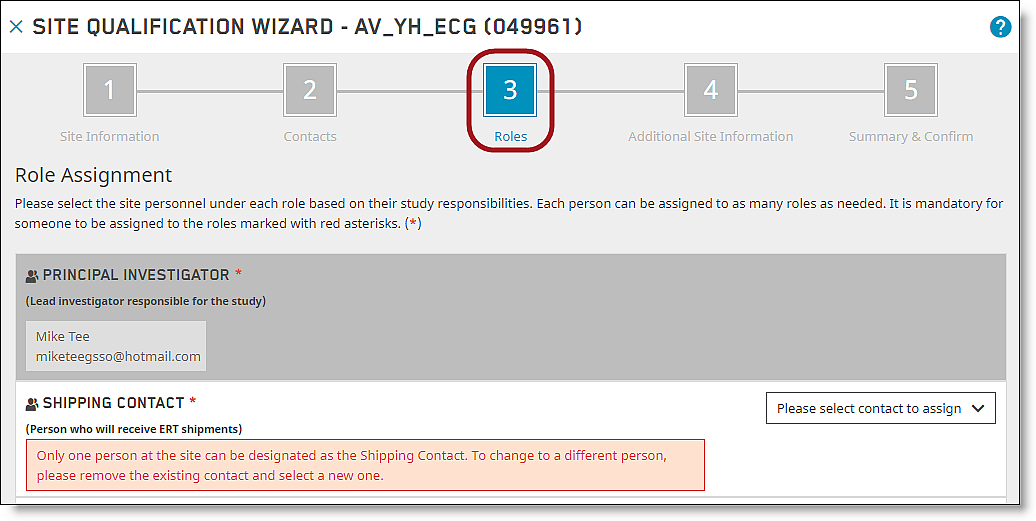
to proceed to the Step 3 of the wizard: Roles.
Choose a role or roles for each user by
selecting the role from the drop-down list. In the example to the
right, the Principal Investigator is being designated as the Shipping
Contact, as well.
|
Each study type has a minimum set of
mandatory roles that must be selected. These are marked with an
asterisk (*)
to indicate they are roles that must
be chosen. The role(s) you
select apply to specific access rights in the Portal. |
6a. After you complete the
role selection process, click the Next
button to proceed to Step 4 of the wizard: Additional
Site Information. The
Site Information requested is dependent upon the types of tests/devices
your protocol uses.

Select all the necessary site
dialing options that apply to your site telephony configuration under
this step.
7a. After you complete the
Additional Site Information step, click Next
to proceed to Step 5 of the Site Qualification Form: Summary
& Confirm.

In the Summary & Confirm
step, all previously entered information can be reviewed and edited
before submitting the Site Qualification Form.
8a. Click the Edit
button to edit Site Information and Additional Site Information. You may
add contacts and modify role assignments.
8b. To edit specific Contact
Information, click the Edit
icon next to the contact.
8c. After you make all final
edits, click the Submit SQF
button in the upper right corner of the screen. Optionally, click the
Save & Close button to
review and submit your SQF at a later time.

Click the Submit
button in the Confirm
pop-up window.
Another pop-up window displays
to advise you that the SQF has been submitted. Click Ok.


After you complete the step,
check your email for a message titled “Successful Site Qualification
Form Submission”. All users added to the form should also receive
confirmation emails, and should have access to the site within the
Portal.
|
If you already have an ERT Global
Account and are submitting an additional SQF for a study you have
already joined, click the Site Qualification navigation tab after logging in and
selecting a study, then click the New
SQF button and repeat steps 5 through 11. navigation tab after logging in and
selecting a study, then click the New
SQF button and repeat steps 5 through 11. |
